Shohin Yew

Yes, another Yew, no fancy yamadori this time. I grew this one from a cutting!

This was it earlier in the year in a training pot.

While over at Bonsai Europa I fell in love with some of the great pots on the Sperling Keramic stand. I had never even heard of Sperling before! A very friendly service with some amazing pots. I picked up this little pot for another tree but wasn’t happy with the match so I’ve decided to use it for this little Yew.

This is it just potted up. A thinning out required this year and some extra shari work.

This was the tree back in 2011 after initial styling.

A few other pots from Sperling Keramic in case you want to see what else came back to Northern Ireland.

Trying Tibolar-RS

Going to give Tibolar-RS this year on a few trees to see how it compares. Only hearing good things about this feed.

Hawthorn – Initial Styling

A totally raw Hawthorn from the sales bench taking it’s first steps.

First Snow of Winter

Today saw me waking up to a light dusting of snow. Nice to see a cold snap for a few days, the trees could do with it, just let it be short lived. I took a few quick snaps before the thaw.

Connaught Bonsai Club?

Could it be that we could now bring bonsai into the last clubless Provence in Ireland?!

Nearly 3 years ago I, on behalf of the Northern Ireland Bonsai Society, helped start the Munster Bonsai Club and a year year the Leinster Bonsai Club. Both are still going strong. Cork and Dublin are the main anchor cities for these clubs and therefore offer a good population in which to recruit new members.

The hard part of bringing coverage to all of Ireland was always going to be the wild west! Connaught lacks the population density of the rest of Ireland but what a place to go hunting yamadori 🙂 I have contact with a few bonsai enthusiasts over that way in Galway and Sligo but never anyone willing to give setting up a club or study group a go…… until now 🙂

I’ve been contacted via my blog by Tim, who not only wants to try and start a club but also has 40 years experience in bonsai. A great starting point for any club.

So my question is, do you live in Connaught and want to join Tim in starting a Club? Perhaps a study group would be a more accurate description of it to begin with, but from small acorns and all that. Tim is based in Ballaghaderreen in County Roscommon.

As before, I’m more than happy to support Tim in setting up as are the NIBS. All joining the club will be entitled to attend NIBS events as a sister club member.

Interested: Please contact me by replying to this post below or via the CONTACT ME page. I’ll not add a direct contact for Tim here as I don’t want to make his email address visible on the net.

Come on people, this is your chance bonsai in the West of Ireland.

Chuhin Yew – Time for a Change

I’ve had this little Yew since 2002 when I bought it as raw material. That said, it was in this pot even then. I love the pot, Ian Baillie only makes good ones but after all this time I felt either the tree had outgrown the pot or I just needed a change.

This is it in the old pot.

And this is it’s new home for the next few years. A nice Japanese pot I picked up with a bit of age about it.. It’s perhaps a little big but the tree could do with a few years of freer root growth as I will now spend a little more time on improving the overall image of the tree.

This was it back in 2003 as raw yamadori material. It’s come a long way but probably has as far to go again!

Shohin Chinese Juniper

I got this little Chinese Juniper in 2010 from a great chap called Bob Snaith.He was clearing out his collection and I got this one at a great price. He supplied me with the first photo below. He’d bought the tree from a chap called Micky Paice who had bought it from Windybank Bonsai back in 1999. Always nice to know the provenance of a tree.

This was it in 2010 as I bought it.

I repotted it and let it sit for a year to gain strength. I then explored the idea of chopping it back to the first branch as I didn’t particularly like the contrived trunk line.

Decision made.

This was it repotted into a smaller pot the following Spring 2012 I think.

It’s been tweaked a few times since then but a few weeks ago I decided to fine wire it and transfer it into a new pot I picked up at Bonsai Europa. This is it prior to wiring.


And afterwards

The new pot and chop mark, Yamaaki.

and now after repotting and a new coat of jin seal applied.

Korean Hornbeam – Changes

I’ve had this Korean Hornbeam for 5 years now. This was how it looked back in July 2010. It was weak and had suffered for a few years and lost a lot of branches. It took 2 seasons to get it on track and build up some ramification.

DSCF1409

This was it in 2013

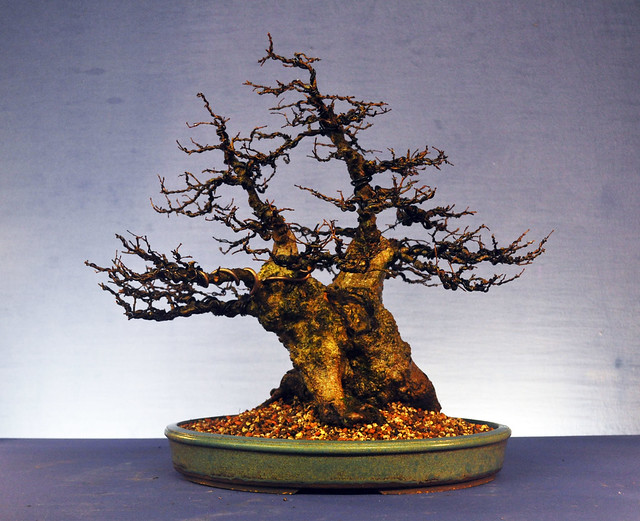
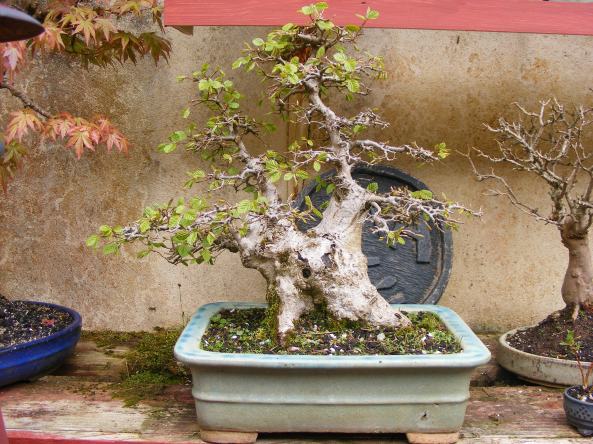
And here in December 2014.

At this point I decided to make a few changes. Both trunks were parallel to each other in the pot creating a very flat image. The main trunk lacked taper along the last portion of the trunk line and about 2 inches from the top is a swelling that looked ugly and was only going to get worse with age. I opted to layer the top off the main trunk to create a little multi-trunk shohin tree for the future. I also decided that I’d change the front of the tree to offset the two trunk creating more depth.

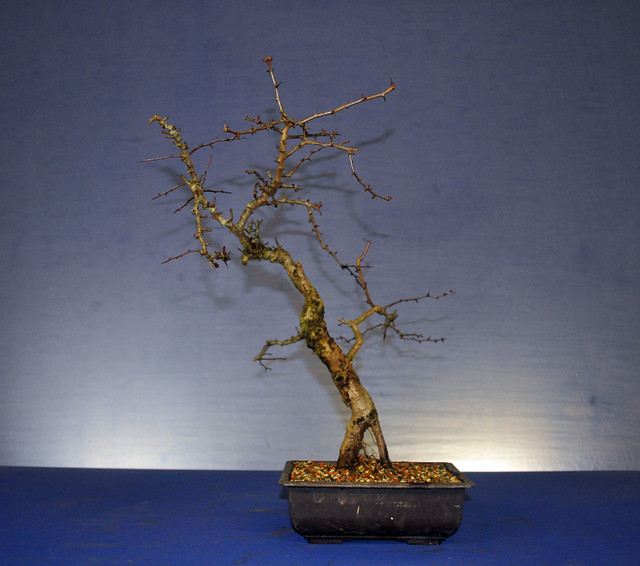
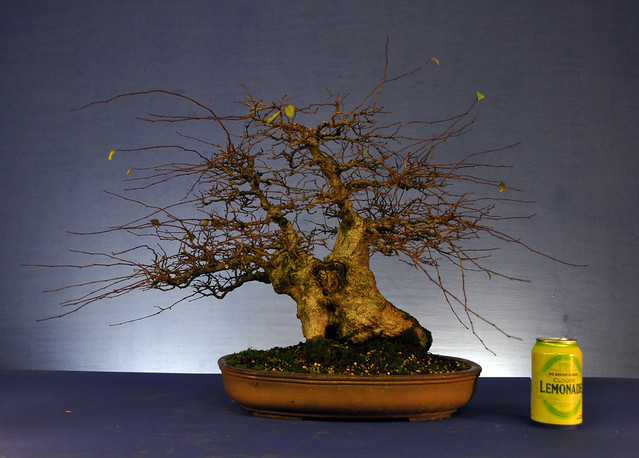
Below is the tree in December 2015 after the layer was removed. I had give the tree free growth for the year to give me a few more options when thinning out the branches.

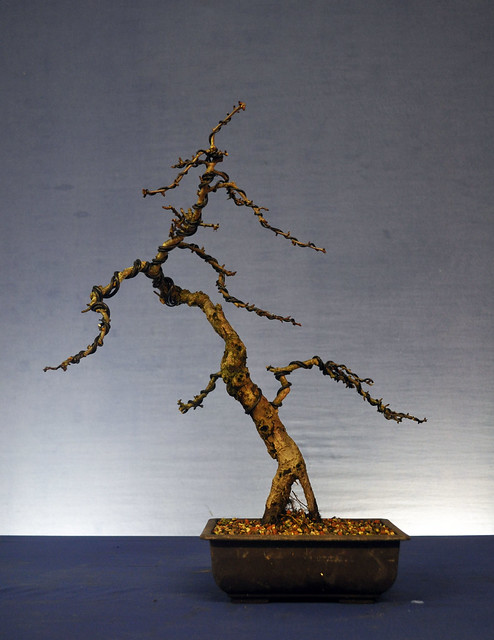
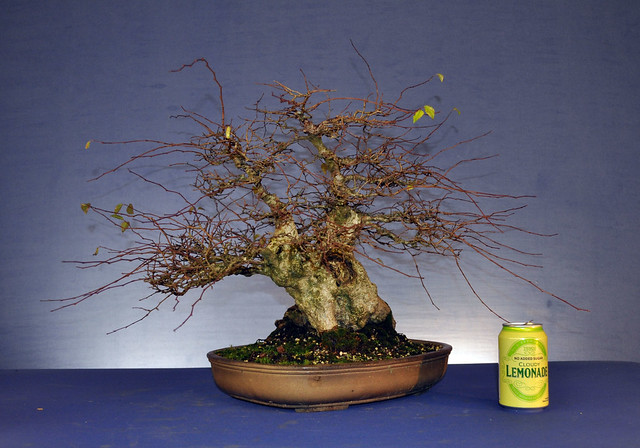
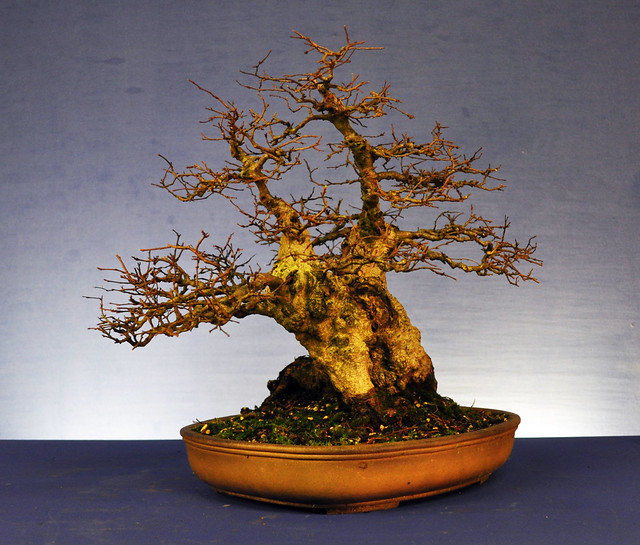
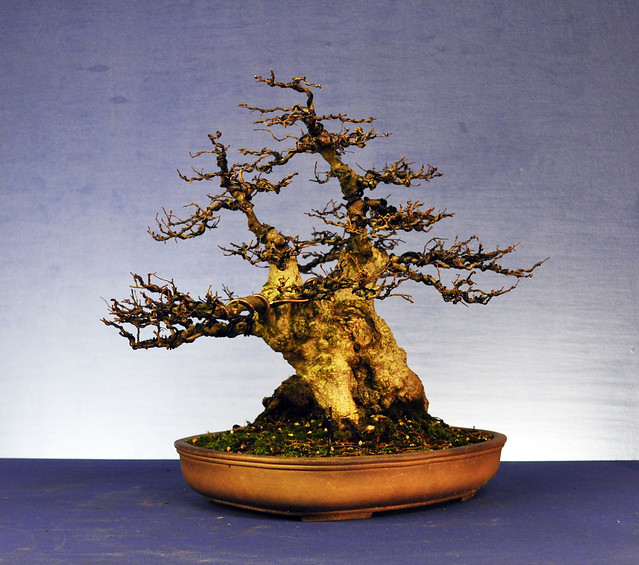
This was to be the new angle for the front. I’d lose a little of the width of the base but give the tree a little more character and depth, hard to see that in a photo of course!

I trimmed back unwanted branches and pruned out a few area that had become too heavy.

I then wired out the branch structure creating the basics of two new apexes and got rid of a lot of clutter and crossing branches.

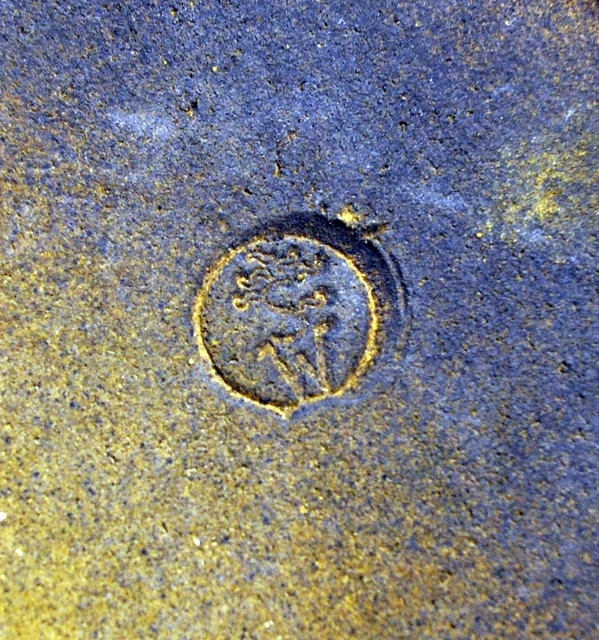
If we are making changes to the front, I might as well repot it. I had a Sylvia Webber pot on the shelf that I love and was itching to use again. I think that’s who the potter is anyway, perhaps someone can confirm from the chop mark below. Is she still making pots? I got this back in 2003.

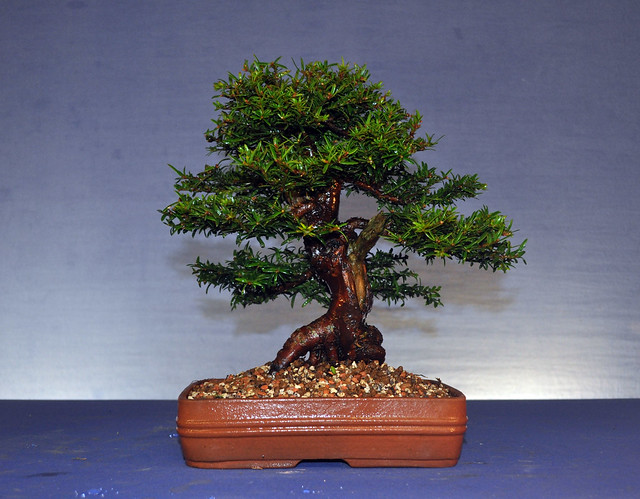
I transferred the tree over adjusting for the new angle. The pot is perhaps a little shallow looking for such a heavy trunk, but I like it. I was also able to remove an ugly root at the back as a bonus. It’s hard to tell just how much better the image is in a photo, especially as the old front looked good in a photo and this photo isn’t great but trust me, I’m a lot happier with where this tree is going in the years to come. Double the current ramification and I think we have a nice tree in the making. That’s what I love about working on Deciduous trees, there’s no quick image to be had like a conifer, the work has to be done year on year to create a descent bonsai.

Trident Maple Adjustments

Looking at the branch structure of these two Trident Maples I decided to make a few adjustment especially in the lower branches.

A hidden adjustment on the Root over rock is a branch that was previously lying on the top of the rock to the left. This has now been dropped to the back and when in leaf will help add to the depth of the image. With a little work this year and a new pot, perhaps this is an option for Europa 2017 😉

As you can see I have gone through a major Walsall Ceramics faze in recent years 🙂

Japanese Larch -First Steps

I collected this Larch about 3 years ago. I was drawn to the natural shari created by wild goats, Sadly some of the branches didn’t open that Spring after collection, the goats really know how to strip bark! I let it sit and establish for a few years and in 2015 put it on my sales bench with a view to moving it on as raw material suitable for a workshop. It obviously didn’t inspire anyone and so I decided to give it a basic shaping a few weeks ago.

This is the before shot.

After a quick look I opted to remove the one live branch at the apex. This had been a twig 3 years ago and had grown strongly but was to far removed from the interesting bits elsewhere on the tree. With the help of my mate Jeff we did some basic stripping of the deadwood and got some wire onto the heavy lower branch. We played with keeping the other branch to the back, but it just didn’t fit with the image.

This is it afterwards. Still cleaning up to be done at this point and a few adjustments but the basic shape is there with some extra branches left as options.

After checking the roots out I decided to go ahead and repot. In the 3 years since collection the tree and filled the box with roots. I put all collected Larch into pure Sphagnum moss and they love it. The problem comes when the moss breaks down and holds too much water, usually after 2-3 years. At this point I repot into a more traditional mix. I was able to jin a heavy surface root as part of the process making a nice new feature and also with the added benefit of raising the deadwood up above the soil surface which will help stop the wood rotting away to quickly.

This is the tree now, cleaned up and lime sulphured, with some more refinement of the deadwood and a year or two’s ramification I think it will make a nice albeit unusual image. A fun piece of material to play about with and for now, it goes back on the sales bench once it opens in the Spring.