
I’ve been planning to use these Elms to make a forest. It just happened to coincide with the Wee Trees Forum Group Planting Challange as well. This is a joint effort between myself and my bonsai mate Phil.
They were all grown by me from cuttings in open ground for about 8 years and chopped a few times for taper. They were lifted in Autumn 2009 and popped into plant pots. Last year I did some very basic styling on a few of the removing unwanted heavy branches in the process.
There’s 14 of them pictured here. I plan to make a group of either 7 or 9 trees. This will give me spares to play with. I even have a few others somewhere if required. I feel it’s important to have more trees than you actually need when creating a group. I want options when trying to fit a tree into the composition, not a ‘make do’ tree. I have created groups in the past where I have just shoved trees in to make up the numbers and these lesser quality trees have annoyed me so much over the years that I sold the group ![]()
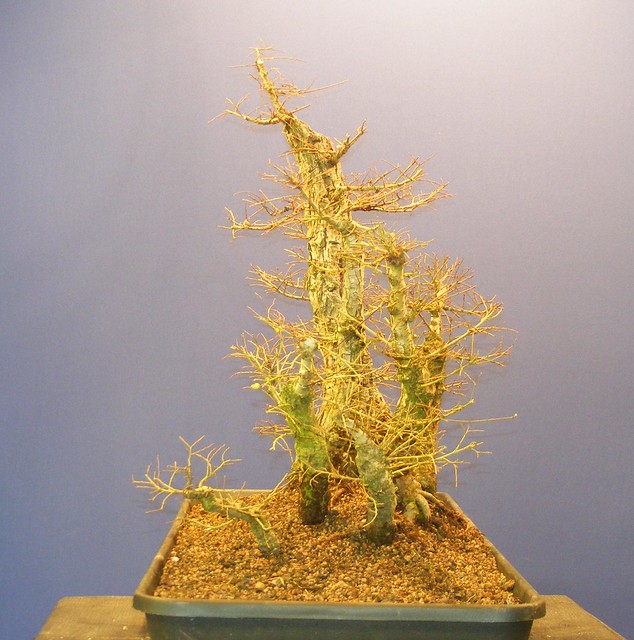
Here’s some of the individual trees being used.


And all together… I was going to make a wooden training box to put then in initially but was hoping for something lighter. I came across this in B&Q in the gardening section. It’s a plastic tray for putting your growbags into. It’s a type of rigid plastic that will be easily drilled with drainage holes without splintering. I will also add a few wooden battens across the bottom to give further strength and to allow air circulation and draining to function better. From memory, it cost about £10.


To start with I needed to prepare the tray. As it’s plastic, it was a simple task to drill drainage holes. Wooden battens were screwed into the base to raise it up a little and allow for drainage and air circulation. It also added to the stiffness of the tray.


 Wires added for tying in purposes. If I didn’t use them I would have spent most of my time picking up trees from the floor.
 We gathered up the trees and decided that a few didn’t really fit with the plan.
 Next we bare rooted the selected trees to enable us to pick and what goes where.

 The old mix from the individual pots was sieved and reused. A layer of mix was added to the bottom of the tray ready for placing the first tree.
 Trees start to be added and are wired into place.


 Basic placement made. Some adjustments are needed to angles and heights along with a trim here and there. This is better done after the rest of the mix has been added to stabilise the trees.
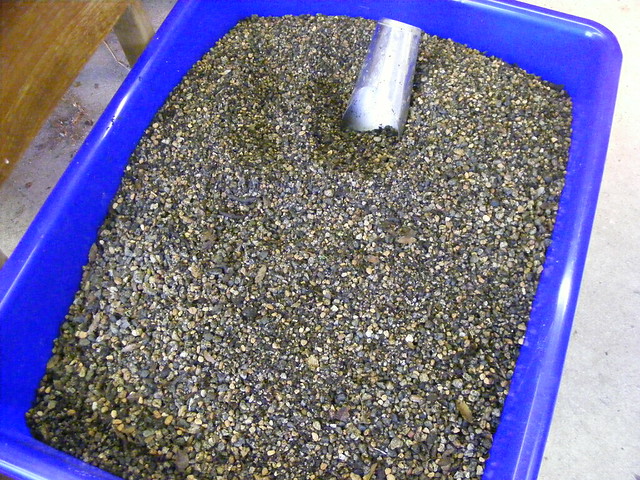
 The mix used is mostly Horticultural grit, SP cat litter and some akadama. Some organic material is present as the mix is recycled.
 The mix took an age to get bedded in. The trees being so close together with overlapping roots leaves lots of air pockets that must be filled.
 Thinned out and heights adjusted.
Front
 Right
Right
 Left
Left
 Back
Back
 two eejits
 ![]()
![]()
 After a good watering, the tray was placed into my poly tunnel for protection. The total number of trees used was nine.
Again, I have linked to the club site for the 360 of this.
April 2011 Update
Before Trim
 and after

May 2011 Update
Here’s the group again just a month later. A good feeding regime of Green Dream and Seaweed Extract has resulted in strong growth and plenty of new weeds too!


and this is it after a second trim this year.


 I did a quick virtual to show this group on a slab and in a pot. I will hopefully have a slab for it to be transferred too next Spring.


Update May 2012
Time to trim yet again. I even managed to get it out of the greenhouse on my own this time. Before trim….


and after an hour with the scissors…


It will probably need a further 2 trims this year and then a decision will be made regarding a repot onto a slab in the Spring.

Wow it’s filling out well I got bucket of chicken manure pellets in b&q and haven’t got a clue how to use them or how much I heard Phillip say to someone to cover it totally so you can only see pellets but I don’t want to believe him until you clarify just incase he was joking
LikeLike
No, do not cover totally! You can tell when Phil is lying, his lips move 🙂
No more than a handful for any of those ones we gave you on Friday. Only feed the Lonicera, the others have already been done. Wait until next month for them.
LikeLike
Ian this is a very impressive piece of work. Congrats on a job well done. I really like the virtual in the second pot. It’s excellent and I’m sure the real thing next year will look just as good. Well done both of you. By the way whose trees are tey. You did say it was a joint effort.
Michael. Bangor
LikeLike
Hi Michael, Sorry for the delay getting back, was busy at Willowbog 🙂
I am rather fond of this group 🙂 It was a joint effort and would you believe, also joint ownership as well!!
LikeLike
I prefer the third option of pot. But the final decision is your.
LikeLike
Hi Jose, I like it but it would be hard to find one like it here!! A slab has already been acquired and it’ll be planted on it in Spring 2013.
LikeLike
IS true is very hard to find, is better do it yourself the slab. I wait for the transplanting en 2013, keep update please.
LikeLike
Beautiful. I just virtually walked through your forest and would have loved to have a water body to sit by. 😉
LikeLike