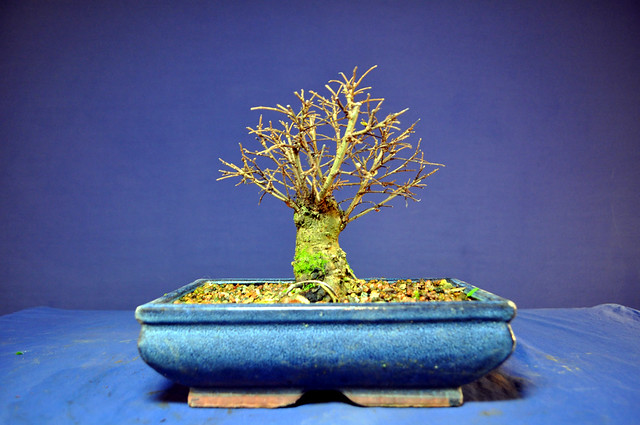
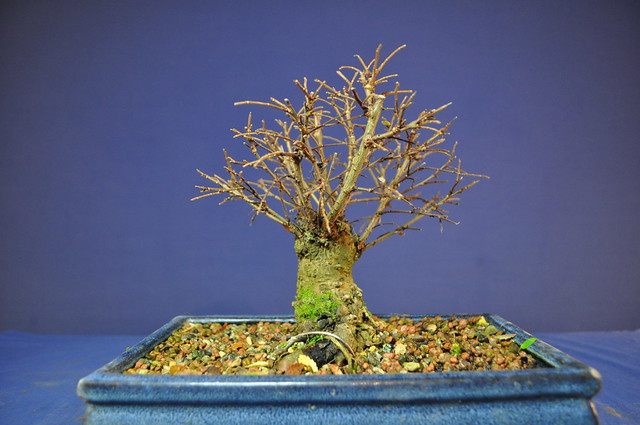
Took a few snaps of the forest while we were sizing it up for a Spring repot onto a slab. Paul B and Bob B should recognise the slab 🙂 A few adjustments to be made before we make the move.


Took a few snaps of the forest while we were sizing it up for a Spring repot onto a slab. Paul B and Bob B should recognise the slab 🙂 A few adjustments to be made before we make the move.
Grown from a cutting, starting to look the part.


An update on the parent plant and the layer I took on a Cork Bark Chinese Elm in 2011.
This is the parent now achieved from a stump in a year. A few bits need to be cut back to balance out the growth but not bad for a year. Might even get a suitable instead of this Sh1te one 🙂
This was it in September 2011

And this is the layer a year on.

I air layered the top off this cork bark elm back in May 2011 and it was removed in August 2011.
This is what I wanted to do with the stump.
This is the new buds appearing in September 2011
This is what it looks like now in just under a year.

And after another trim.

This is the post about some work carried out on a shohin Cork Bark Elm
This is the Elm now after 3 weeks growth.

I did a little trimming on this Cork Bark Elm Forest on Saturday. Full selection of photos can be seen under the Case Studies Tab, or just click the photo below.

This is the other Shohin Cork Bark Elm that I’ve been working on. Strong growth this Spring and it was time for a trim back to produce further ramification on the right parts of the tree.


The moss is a real pain in the Arse on this one!
This is another little Chinese Elm that was salvaged for a few quid from a local store. I really am a sucker for a sad case. It’s now a lot smaller that it started out and it needed another trim.


I got this little Shohin Corkbark Elm from Willowbog Bonsai last year. It was repotted this Spring and after a slug attack on the new emerging shoots, it’s eventually got around to growing. It’s been a strange yellow colour and has produced some variegated leaves.

At the BSA Exhibition in March I watched Peter Warren working on a very similar tree during a demo. I thought it would be hard to make any real changes to it, but he proved me wrong. As you can see in this photo taken during the Winter, the tree has two leaders within the canopy. Peter explained that this was disturbing to the eye. As you follow the movement of the trunk line and then reach the two leaders, you don’t know which way to go in following the flow of the tree. [ Not his exact words, he said it much more eloquently than me :-)] Peter removed part of one of the leaders and adjusted a few other branches making a tree with far less disturbing structure that was more pleasing to the eye.

As I had repotted the tree, I didn’t want to attempt this until it was clearly recovered. The other day I decided it was time to follow Peter’s advice on that similar tree and reduce the second leader. This was the result.

It will look a little sparse for a few months but will fill in quickly resulting in a better tree. The tree has to take a step back to progress forward.
I love moments like this where you think you are happy with a tree and then someone waltzes in and with one snip shows you a better option. I have a far idea that Peter might be doing that a lot when he stays with me in October. Can’t wait.
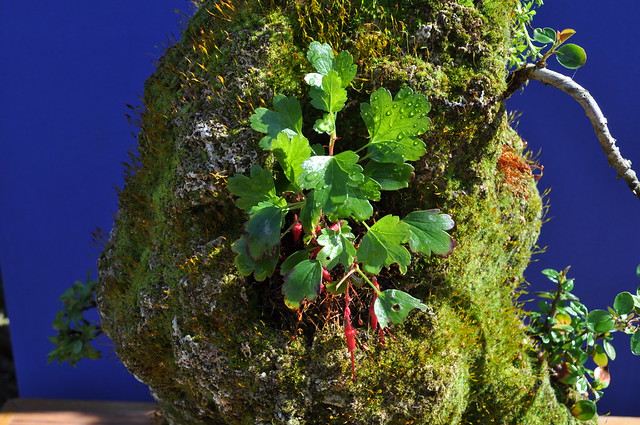
I was given this lump of Tufa by Josh about a year ago. We had been talking about rock plantings and I mentioned that I’d been looking for a weathered piece of tufa but could never find a suitable one. He said, ‘Hold on a minute’, disappeared around the side of the garage and came back with this in his hand. It was already mossing up nicely and has gotten better in the last year.

I’m not planning anything too fancy with it. I just wanted a natural lump of stone with a few odd bits and pieces clinging to the rock face so to speak. I have added a few cotoneasters, an elm, a hawthorn, a creeping willow and a flowering current! With the flowering plants and different types of foliage it should make an interesting object to look at in a few years time. It’s still very early days. The cascade cotoneaster isn’t right and will probably be replaced once I find a suitable replacement. Everything else needs to mature.
The Elm clinging to the rock

The flowering current, not the usual one you see in gardens I might add, this is a climbing one that with some leaf removal and pruning in the next few years will make a nice splash of colour on the rock.
A cascading Hawthorn

A dwarf willow that will climb down the back of the rock and create a very nice image on a bare uninteresting part of the rock. I have seen this used before by Stephen, aka bonsai baker to great effect.

The moss is delightful 🙂

I keep it under a bench in the shade to encourage the moss and keep it moist. Ideally I would like another smaller piece of tufa to add to the finished image by making it look like two islands sitting in a water suiban. Aiming for something like this 🙂

Another Air Layer from last year. I decided to repot this one also. I was amazed just how flared the nebari had become in a short time.
This was the layer last year, full post HERE

This was it at the weekend before repotting.


Again with the roots raked out and the layering moss removed.


Before potting up I was able to removed the stump at the bottom. This helps flare out the nebari even more.

Due to the roots still being delicate, I used bamboo canes over the outer spread to hold the tree in place. These will eventually rot away in the pot.

Potted up and a bit of a trim.

Shop for quality bonsai
bonsai and garden
The Kaizen Bonsai Blog
Teaching, Learning, Enjoying Bonsai
The ramblings of an old artist and someone who would like to grow better bonsais trees
my bonsai
My wood creations
Hand Crafted Furniture
Creativity Through Bonsai
dirt leaves flowers
bonsaï | vidéo | Japon - ActuBonsaï
Japan's aesthetic, craftsmanship and spirit
Bonsai with a hint of madness...
"Tibolar-RS. your soil needs it, your plants will love it"
