
Amazingly I didn’t post anything on the blog yesterday!! The main reason being the Royal Wedding…. only kidding, I was having a bit of a Royal Bonsai Day at my house with friends coming during the day to play with trees and have a bit of Craic.
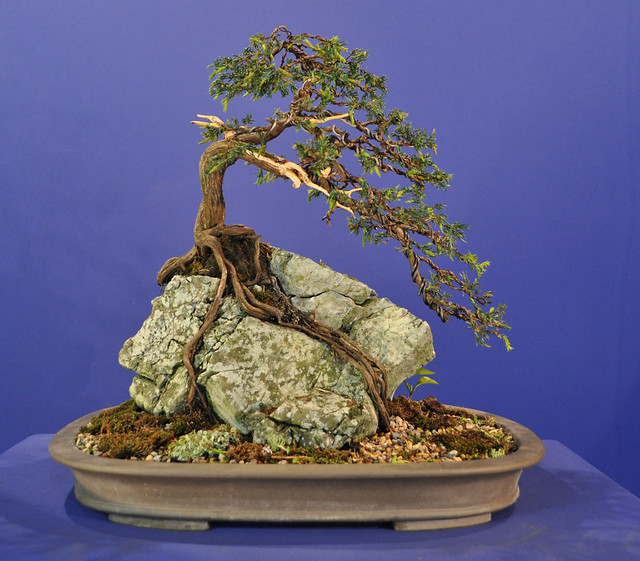
First up was this Root over Rock Juniper possibly ‘Repanda’ owned by Stephen. When Stephen bought the tree about 5 years ago it was very overgrown and he has worked hard to get the foliage chased back enough to allow for this styling to take place.
 Stephen and I got to work getting the whole thing wired. Well, Stephen drank about 3 pots of my coffee in the process 🙂


 Maggie kept an eye on us from a hidden location.

 Fully wired but as yet to be styled.


After some basic placement it became evident that the left hand side branch wasn’t required in the design.
 We even considered a more brutal pruning option. This is an option for the future but there were concerns over losing a corresponding root by removing the branch all in one go.

 Here is the final outcome.
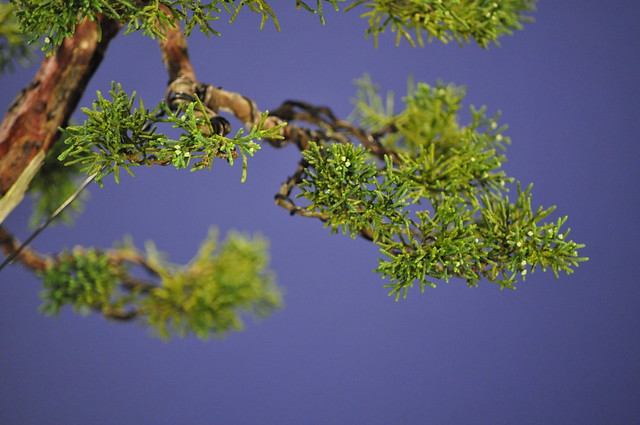
 This was it after some work. Some final tweaking of foliage required but we ran out of time.
 The foliage needs to gain some more vigour and I plan to foliar feed during the year.


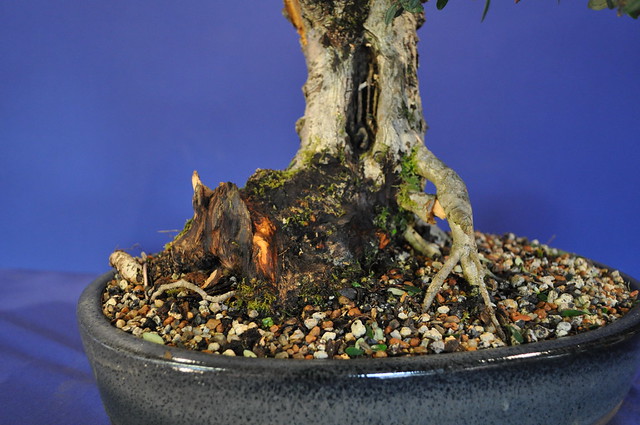
 It’s an urban yamadori tree and if memory serves me right, it was salvaged from a school grounds. A few ugly rots at the bottom need to be removed to reveal a better nebari underneath, This can’t be done in total just now. The deadwood at the top needed some work with a view to eventually joining it with the deadwood at the bottom left of the tree. Some adjustments to the foliage should also help pull the whole image together.


 This is the original front as the tree was potted but a view more from the left would show off the deadwood to better effect.
 I gave it a weeding and trim. A few branches got a light wiring to place them in the right position. If it continues to grow like this it’ll fill out before the end of the year!! Here’s the result of yesterdays work.


 This is a bud before pinching out the centre. A few have what look like flowers appearing. I’ll have to wait and see.
 Evidence of pinching on the bench.
 This is some of the back budding close to the tips. However major pruning is producing adventurous buds on old wood so this might be removed altogether to help fill inner branches with buds.


 These are what I’m removing. Some have already dropped the flower petals leaving the seed heads.
 and this is it 45 minutes later.
 this is under the bench!
 I have given the tree it’s first feed and a good watering in.
 It had fully opened since then but I wasn’t happy with the length of some of the internal branches. I want to build up a fine ramification and some of these are too long and straggly. I decided I needed to take it back in quite hard to eliminate the strait bits and force some back budding. This is it today.


