Deforestation

I’ve had these 3 Japanese Larch as a group for many year. Each tree is actually very nice on it’s own. I’ve got to the stage now were I have lost interest in the group. Rather than sell it, I’m going to take it apart and pot up the trees individually. At some point in the future, providing I can get similar quality larch, I may put it back together as a bigger group. As you can see, I have also allowed these free growth this year to give me a few extra options once they are potted up separately.

These are a few photos taken over the years showing this tree develope. Earliest is 1997. I think I have moved on to the extent that it doesn’t ‘float my boat’ any more. I still look back at these photos with fond memories.

Cork Bark Forest Case Study Updated

I did a little trimming on this Cork Bark Elm Forest on Saturday. Full selection of photos can be seen under the Case Studies Tab, or just click the photo below.

Ben’s Beech Group

I plan on looking back at a few of the trees worked on over the weekend, as does Peter on Willowbog Chat. As Peter didn’t get a chance to work on this one, I thought it was safe to share.

This was a beech group that Ben had in a pot for 4 years. They are young trees but even still they can make a nice image. Ben had brought the group to a meeting and I suggested that they would look better on a slate. It just so happened I had one lying under a bench that was big enough, and gave it to Ben. I also suggested that a few thicker trees would greatly improve the image as well.

Ben took me at my word and brought it along on the Sunday along with a few Beech that were recently liberated from a garden.

If it was just a matter of lifting the existing planting out of the pot and popping it onto the slate, it would have been easy. No tie wires even needed as the trees were all meshed together after a few years in a pot already. Our problem was that a few new and bigger ones had to be added. I had 2 choices, split the whole group up and start again or fit the new ones in around the existing trees. I opted for a bit of both. I liked the positioning of the original trees but I split the group in two creating a gap for the new ones. I drilled the slate and wired these in place and also added a few tie lines for the original trees as well. The whole lot where then covered in keto and then moss.

Ben was pleased with the result and I feel the slate works far better than the pot in this sort of forest planting. Now he just has to keep the birds away from the moss 🙂

Here are a few photos of the action. Sorry no starting shot of the original group. I honestly thought I had one somewhere from the meeting Ben, ah well.

Ben me and Ovidiu doing a little manoeuvring.

My secret technique of using the force to position the trees 🙂

Ben checking that the work is up to standard.

Adjusting the heights of a few trees to make a better design.

The finished forest at the end of the day. The new trees are slightly darker bark for now but this will even out with equal exposure to the sun.

Ben emailed these photos taken in 2007 when he put the original group together. I believe it was his first attempt at a forest.

Interesting Article

Someone shared a link to this article on Linkedin and I thought it was worth sharing it here. Some beautiful photographs of trees, unfortunately accompanied by a sad story.

Just click on the image below to view the gallery of photos, and click HERE to read the story.

Slab Larch Virtual

Following on from my last post about Roy’s Larch group and the comments made, here is a slab virtual that retains the rock element.

and with part of the rock removed for better lines.

The original pot virtual.

and the original

side by side…

Larch Forest Pot Virtual

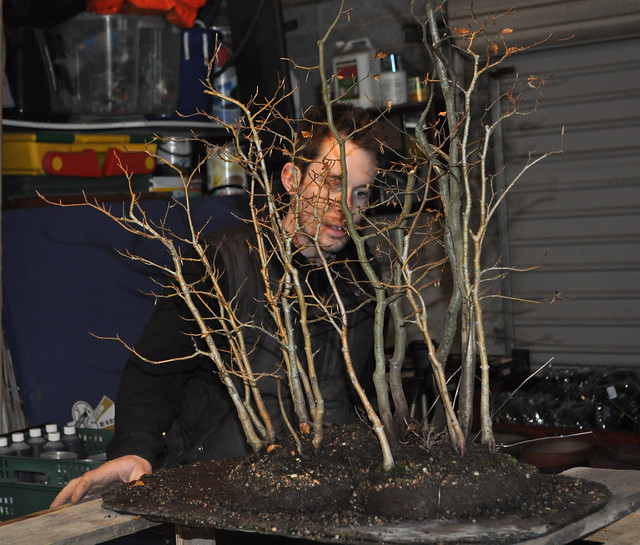
Roy C brought this Larch forest to the club meeting on Friday. Roy has been creating bonsai for many years on his own, learning from books and his own experiences. About a year ago he heard about the NIBS and made contact through the Website. He has a bit of a drive to make it to the meetings but when he gets there, he always has something interesting to see.

This forest was created from young Larch seedlings that had self seeded into the guttering on a shed roof at his farm! When he put this group together, he added the white limestone as it reminded him of his local landscape. I quite like this sentimental idea but in it’s current form, the white rock over powers the image and the rocks are a little too angular.

We chatted about the group at the meeting and I made a few suggestions that in my opinion would make for a better image.

Firstly I felt that the stones should go. The rock to the left look as if they are holding the trees in the pot and are very distracting.

Secondly I felt that the height of the soil mass should then be reduced. It sits very high in the pot in its current design. This may be more sustainable in a wider pot.

Thirdly, a change to a larger, shallower oval pot would greatly improve the image. The current rectangle is too deep and inappropriate for a group.

Lastly, I felt that a few of the trees should have their height adjusted to give a more overall triangular over view. This could be enhanced by adding a further small tree or two at the edges.

I took a photo and said I would play about with a virtual to see if helped explain my views. Here is what I came up with.

A smaller tree could still be added to the right hand side during repotting. If Roy still wanted to include some white stone, a well weathered piece with a more worn appearance could be added in the space to the right as well. It would need to be low lying, mostly buried, just visible on the soil surface. Two trees to the right have been shortened as well.

With a few more years of ramification and a little wiring here and there, I think this will be a very nice little group indeed. Moss would be nice but the sparrows on the farm do major damage, but the less said about the sparrows and Roy, the better 😉

New Case Study

To save me having to look back for old posts about the Cork Bark Elm Forest, I have added a full story/time line to the case studies Tab. I’ll add to it every few months to show the development of this group.

Click on the photo to view the case study.