This year I had problems with some old injuries to my neck and shoulder. This impacted quite a bit on how I worked with my trees. Most people take for granted, or just don’t consider, how they position themselves when working on their bonsai. Hopefully this post will make you consider these things in more depth, it may even save you a little pain in years to come.
When you learn the basics of wiring, it usually centres around how you apply the wire, what size of wire, etc. However, a big part of it is how you stand, sit and position the tree while you wire it. Some trees take many hours to wire and repetitive movements made with the wrong posture will result in pain, now, or in the future.
The images used are just snap shots of a moment in time and don’t necessarily show a person working for long periods in the wrong position, it’s just that I may have caught you at the wrong time 😀

The best person to demonstrate how to position yourself when working on trees is Marco Invernizzi. Marco always looks relaxed when working on a tree and will constantly correct your position during a workshop to ensure you are working to your maximum potential.
So what should you do? To start with, consider what height the tree is and decide if you are going to work standing up or sitting down. This will determine the height of the table you use. When working on a tree you should be able to wire the tree without repeatedly needing to raise your elbows up and out from your body. If the tree is placed on a table that is too high, this will require you to raise your elbows. This will cause unwanted strain on your shoulders and neck.

Here you see Stan removing bark to create jin on his Larch. If there was a lot of jin to create in this tree, at that height, the tree should be placed on a lower table to save his shoulders. In a workshop senario, this can be difficult with limited space.
Also ensure that the tree is placed close to the edge of the table. If you place it in the centre of a large table, you will have to stretch too far and over a few hours this will exhaust your shoulder muscles.

Her you see Ian B at a club meeting thinning out a Zelkova. By placing the tree at the edge of the table he avoids stretching. However, the tree is a little low.
Make sure you have a turntable. If you don’t have different table heights then a turntable with an adjustable height is essential. As you work on the tree, rotate it so that the branch you are working on is facing directly towards you. I have seen many people stretching around a tree to add wire rather than move the tree. Let the turntable do the work.

Here you see that Peter has positioned Ian B’s White Pine at the right height to allow proper examination of the roots and branch placement on the bottom pad.
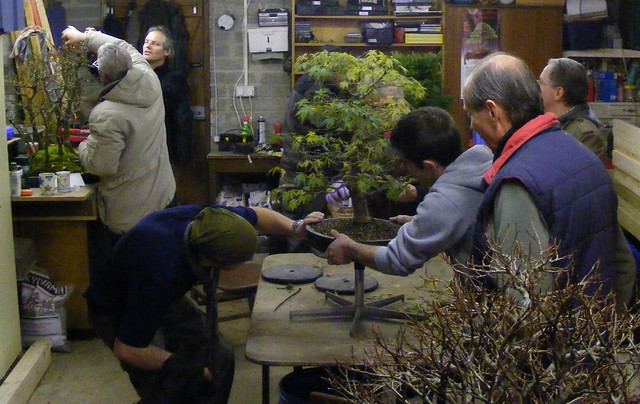
Her you see Keith and Glenn placing a tree on a turntable to get it to the correct hight. By pulling it over to the corner a little more it would also allow both of them to work on the tree without stretching. In the background, stretching for the apex at that height will tire the arms if carried out repeatedly.
Are you a stooper? If the tree is too low, you will find yourself bending over the tree for long periods and this will result in neck and back pain. Consider sitting down.

Here you see me stooping over a friends tree in a workshop instead of raising it to the correct height. The owner, Bobby had the sense to work on it sitting down. This will cause back pain if prolonged. Stan in the background has his Larch at a raised table to allow work at the correct height.
Standing or sitting? This is personal choice. As the years pass, a chair becomes more appealing. I personally do a little of both. As sitting requires more elbow raising, I tend to stand a lot to save my shoulder injury.

Here, you can see that I’m sitting down to carve a Cotoneaster. This allows me to support the forearm of my injuried right should on the table taking the strain. It also allows better support for carving too.
Danger times!! All this is well and good but, as soon as you work on a tree with someone else, most of this goes out the window!! You will find yourself stretching to save the tree being moved as the other person is still wiring. You will stretch to wire the top branches instead of adjusting the height of the table or turntable. Being tall and being friends with a few hobbits helps 🙂 I do the top, they do the bottom 😉 Workshops and demos always cause trees to be worked on at the wrong heights and angles.

Here you see Peter working on a workshop tree whist rotating around the room. Rather than shift Bobby away from the tree he stretches across the tree to demonstrate the technique required. Good for teaching but bad for his posture. Again, this is only a snap shot of a moment in time and wasn’t a repeated action over a long period.

Philip shows an unusual position whist styling his Juniper in a demo. He was unable to place the tree lower as the crowd wouldn’t see the action so, adding to the drama, he stands on the chair!

Take regular breaks when completing a long wiring job. This allows muscles to relax and loosen up before continuing. These two eejits know how to relax.

When lifting large trees, get help. Don’t push your luck and risk causing injury.
I hope this makes you think a little deeper into how you work on your trees. Not just wiring, but repotting, carving, pruning etc. By making a few changes and paying more attention to how I work on trees I have saved myself a lot of pain. Usually after a workshop I’m wrecked! But the last few have proved to be pain free.
Got to go, my back is sore sitting at this computer for an hour 😦


